
An interactive set up program helps the setup of SQL
Server 2005. The steps have been designed to help the
Administrator select the requisite options along the way. The
setup screen automatically starts up as soon as the CD/DVD
is inserted into the drive. If it does not, the user can start the
setup process by browsing the contents of the CD/DVD and
double clicking the setup.exe.

The next screen informs the user that some of the required
components will be checked for and upgraded. Setup installs
some necessary components prior to beginning the SQL
Server installation and before any files are installed, the
System Consistency Checker verifies that there are no
problems that will prevent installation.
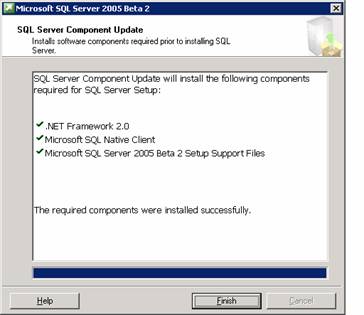
Note that .NET Framework 2.0, Microsoft SQL Native Client
and Microsoft SQL Server 2005 Setup support files have to
be installed. The finish button is to be clicked. Now the
Welcome screen appears.

The next step is the system configuration check. The report of
the check is displayed to the user. The success or failure of
the check is reported along with warnings if any.
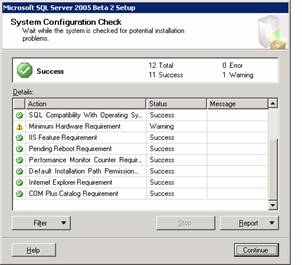
Once the user clicks continue the installation begins.

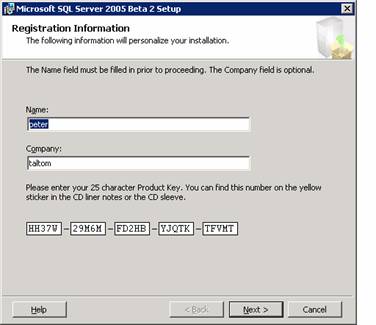
The next step is to enter the registration information.
The user enters his name, company name and the serial
number as it appears on the yellow sticker on the cover of the
DVD. The user then clicks on Next to continue.
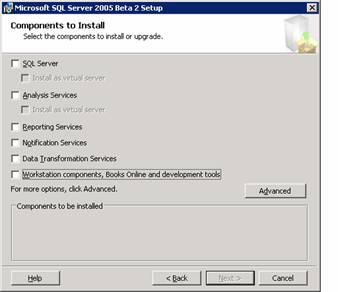
Next the components to be installed have to be specified. The
user can chose to install all the components or some of the
components. Some of these components require further
configuration information and the user will be prompted to
enter such information if the components are selected. If the
SQL Server is being installed on a cluster, the user will be
required to enter cluster information.
On clicking Next, the Feature selection dialog box appears.
All the selected features are displayed.

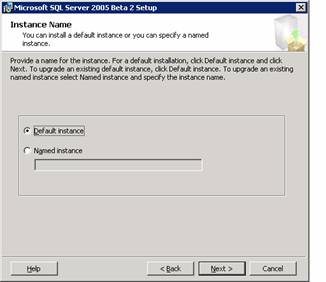
On clicking next the user is prompted to select the instance
name. If he selects Default instance no name need be
specified. If he selects Named instance, he will have to
specify a name for the instance. Click Next to continue.
The user is now prompted to enter the details of the service
account which is to be used for login to the server. The local
or Domain user account can be selected. The security context
required to run the SQL server demands that a user account
be specified during installation. By default Windows
authentication mode is supported.

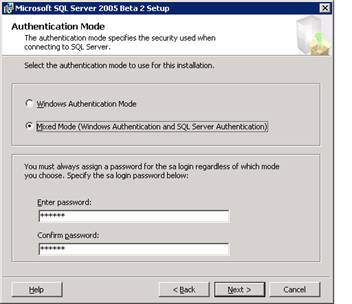
The Authentication mode dialog box appears. The user must specify the authentication mode. It can be Windows
authentication or Mixed mode. The user must assign a login
irrespective of the mode selected. He must enter the
password and confirm it before clicking next to continue.
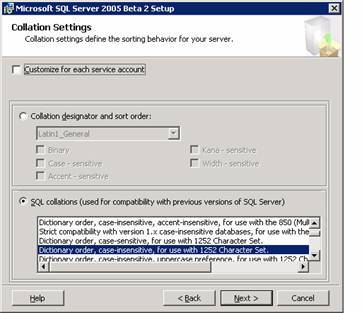
The next dialog box is the Collation Settings dialog box. Collation settings define the sorting behaviour of the server.
SQL server collations are used for setting up compatibility with earlier versions of SQL Servers.
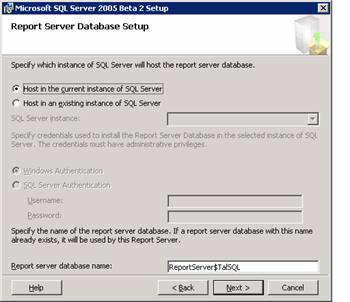
The Report server database setup dialog box which appears
requires the user to specify the instance of the SQL Server
which will host the report server database. Select Host in
current instance of SQL Server and specify the report server
database name and click next to continue.
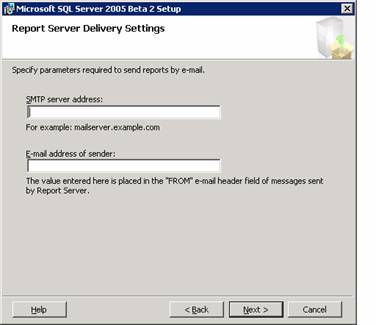
The Next dialog box is the Report Server Delivery Settings
dialog box. The user has to specify the parameters required
for sending email reports. Click Next to continue if you do
not wish to enter any details here.
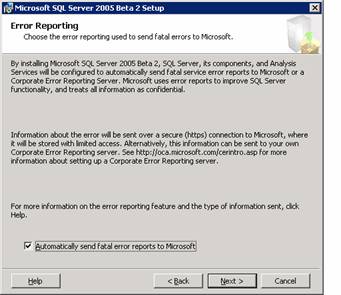
The Error Reporting dialog box appears prompting the user
that SQL server, its components and Analysis services will be
configured to send fatal service error reports to Microsoft or
a corporate error reporting server. The user can select the
check box and click next as this helps Microsoft in monitoring
its services and improving upon its software. Click Next to
continue.
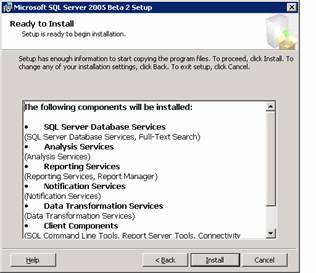
The ready to install dialog box displays all the components
that are going to be installed on the system. To proceed with
the installation the user has to click on Next.
The setup progress bar is displayed. On completion of set up
the Next button will become enabled and the user has to click
on Next to proceed.
The next dialog box displays all the files that are being
configured. The user has to click on Next to continue.

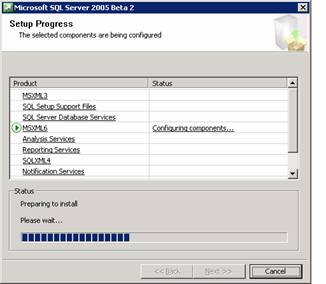
The last dialog box displays the progress of the set up. All the
selected components being configured are displayed and
their status indicated. Click on Next to continue.

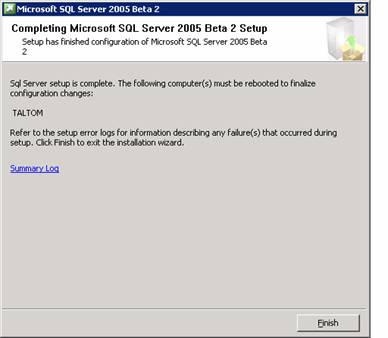
This takes the user to the final screen of the setup. The
system is required to be rebooted for the configuration to
take effect. The user is asked to click on finish to reboot the
system. The user is informed that any errors in set up are
recorded in the summary log for future reference. Click on
Finish to complete the process.
In the section that follows we shall see how this installation is
maintained.


No comments:
Post a Comment